|
|
Post by knotthead on Jun 29, 2008 6:31:56 GMT -6
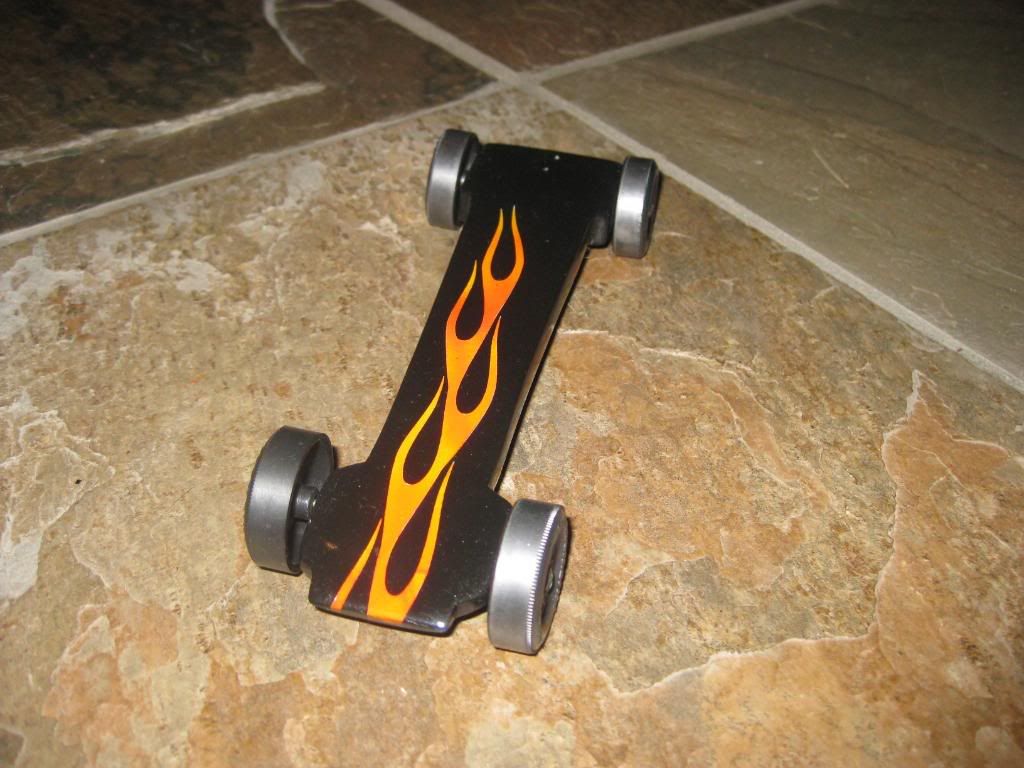
No doubt, some of you have seen this car lurking about in another post. What I'm going to do is give some "build" pics as the car progresses, so that a newbie (or even an "oldbie") can see what's involved in how I make 'em, and maybe see a different twist or two...    The first pic shows the car, cut and sanded with wheels mounted. Its' weight is .64oz. The second pic is after the body has been given several coats of sealer, sanded between coats, then a body cavity was made using a Dremel and sanding barrels. The cavity is then given a layer of Elmer's wood glue after an axle tube (styrene tubing 5/32" dia.) is made to "hide" the axles from the adhesive and the body putty yet to come. I use 1/4" square tungsten cubes from Max Velocity to give the car most of its' needed weight, but this is sort of a guessing game, because the plastic filler will add weight as will the primer and paint. As the car sits now, it weighs 155.5 gms or 4.62oz. At this point, my scale becomes my best friend. The third pic shows the added chin mount so that the car will line up correctly on the starting pin, because of its' off-set nose. Also, you'll notice the slight body cut at the DFW, 'cause the car will ride the rail Stay tuned, more to come... Lee |
|
|
|
Post by beakerboysracing on Jun 29, 2008 6:56:00 GMT -6
Lee, You are truly a craftsman!  I been looking at your work for a while and you are hands down one of the best at woodwork! ;D You have got my interest peeked.  What is the round cylinder looking thing in between the rear wheels? I've never seen that done before. Also, what is the purpose? Do you get better alignment? I would assume it is hollow inside for your axles to slide in. Please share, I'm really curious. Thanks Scott Beakerboys |
|
|
|
Post by knotthead on Jun 29, 2008 7:34:56 GMT -6
Scott
Thanks,man... What you're looking at is a plastic tube that the axles go into. It has nothing to do with alignment. It just covers the axles so that they don't stick to the glue and body filler. There's not much wood left for the axles to grab onto, and I'll probably use set screws to secure them in place, but that's later
Lee
|
|
|
|
Post by knotthead on Jun 29, 2008 12:12:48 GMT -6
Now for the messy stuff. I'll be using two types of filler, the basic "bondo", and a glazing putty that will fill the inevitable pin hole/ bubble that's created when mixing the filler  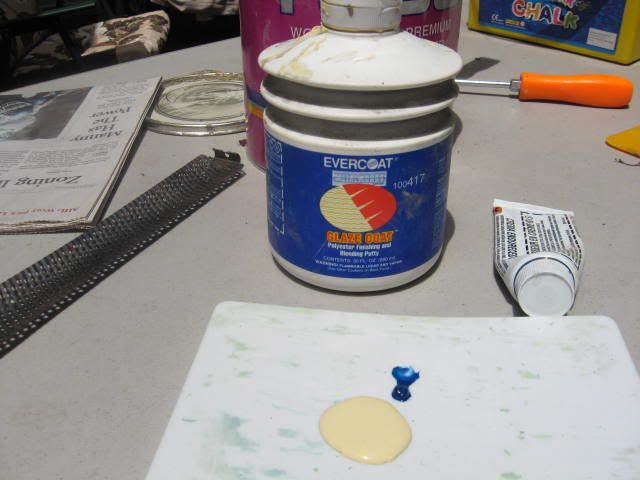 After putting the filler in the cavity and letting it cure 'till almost hard, a bodyman's tool, called a cheese grater for obvious reasons, is pulled across the material to "knock it down" and make the sanding with a coarse paper/sanding block easier 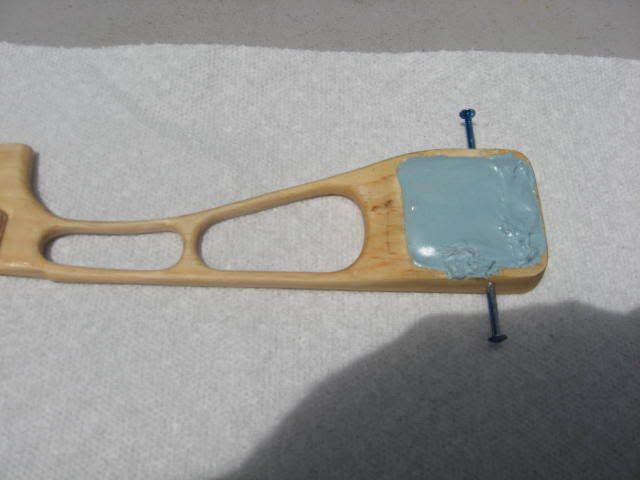 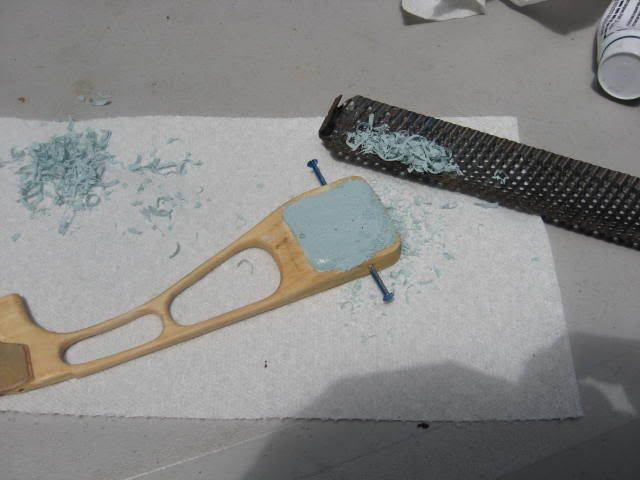 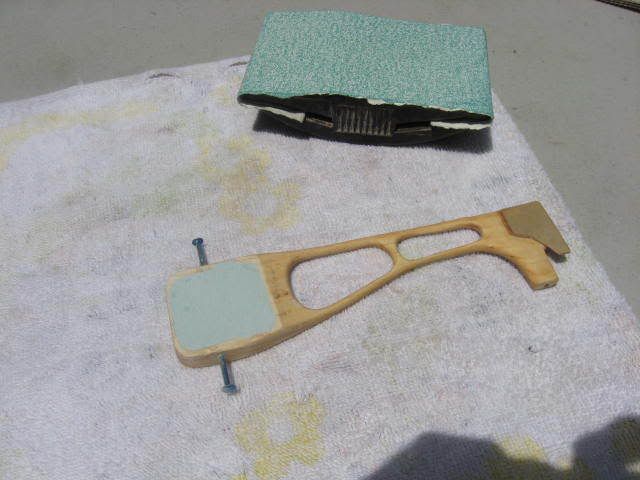 Following a sanding with 180 then 360 grit papers and a popsicle stick, it's time for another weigh-in  4.75 ounces... Good, still room for sealer/primer/paint Later... Lee |
|
|
|
Post by ProQuest on Jun 29, 2008 15:06:06 GMT -6
Lee,
Awesome work. I really appreciate you sharing your building techniques, especially your sealing, priming etc. Anyone who has seen my cars can tell you that I am in desperate need of improvement in that area (among others). Keep it up.
Steve
|
|
|
|
Post by knotthead on Jun 30, 2008 4:55:46 GMT -6
Okay, we're now at the point that seperates the men from.....their wives , getting ready for paint. I use a product made by Zinsser, called Bulls Eye Seal Coat Universal Sanding Sealer (not an endorsement but a good product), to seal the raw wood. You can apply it any way you want. I use disposable acid brushes. Lay it on evenly. It will dry in about 15 minutes, and you can work with it in about an hour. I use a 180 grit paper to scuff the surface between coats (usually about 3) and I use light to check the surface as I go, the low spots remain shiny while the rest gets dull. Usually, after 3 coats/sandings, the body is nice and smooth, with no trace of wood grain (the grain is harder than the wood and will sometimes raise above it making "ripples"). The body is now ready for primer  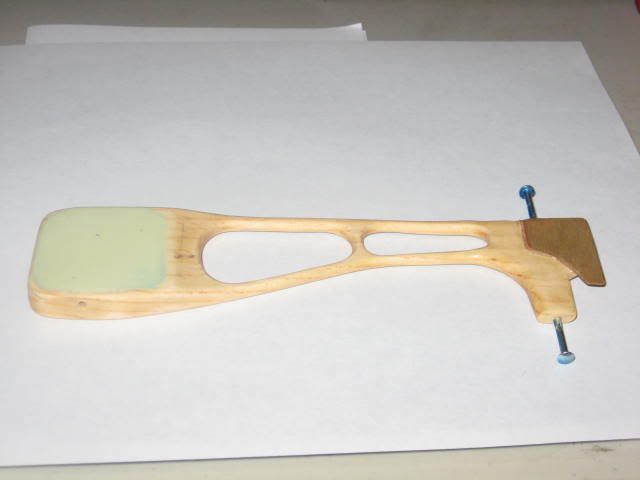 From this point on, things will slow because of cure times and when/where you can paint. I've been beheaded several times by using the basement as a spray booth  . Wives just don't understand..... Later... Lee |
|
|
|
Post by knotthead on Jun 30, 2008 5:43:42 GMT -6
A question arose earlier about the axle tube, and I mentioned set screws would be employed. Well, now's the time to do it, BEFORE(!!) the paint job;  Later... Lee |
|
|
|
Post by knotthead on Jul 1, 2008 17:26:15 GMT -6
The first coat of primer is on. This coat usually reveals any little discrepancies in the bodywork. This car is no exception;   If you look really close at the second pic, you'll see a few small pits that need to be addressed. Also, you'll see how the primer can be rubbed off of the edges. Paint is always the thinnest there. At this point, I'm using a 3M superfine grit sponge and keep it wet as I rub. I'll fill the pits with body glaze then prime again. Even though the body now feels like plastic instead of wood, it's not time for paint. Weight is now 4.76oz. For those of you wondering what type of paint I use, it's automotive paint. The primer is Sherwin Williams that our bodyshop uses, and for colors, there is an auto parts store (not a chain auto store)that will make a spray can of any auto color, I just provide the particular manufacturers paint code, and they make for me a nice tall spray can, usually about $19.00. Not cheap, but it's exactly the color I want. There are some really pretty metallics and pearl colors available. My favorites are from Toyota and Volkswagen, but Mazda and Ford also have nice shades too. A word of caution, here. Make sure (!!!) your hands are clean when you handle your car, maybe even use latex gloves. Any body oils can be transferred to the primer and play havoc with your top-coat, spoiling an otherwise good job. Also, any aerosols used nearby can leave airborne stuff that could land in your fresh paint. Even a bug, right Doc? Later... Lee |
|
|
|
Post by knotthead on Jul 2, 2008 18:00:54 GMT -6
We're ready for paint! Got it to where I want it after 4 good coats of primer and many sandings. 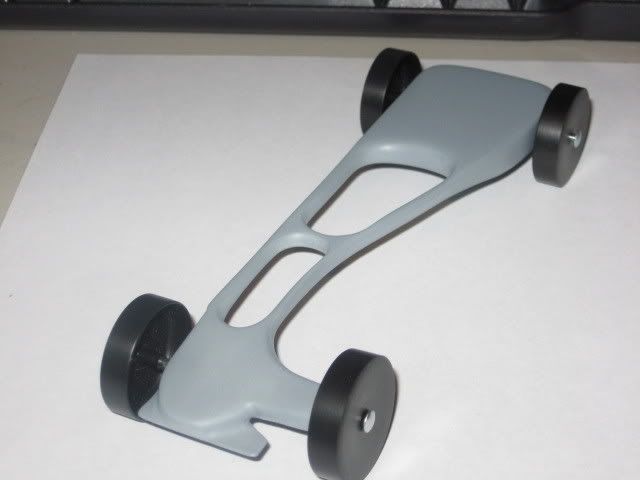 Was hoping to give it color this week end, but it ain't gonna happen. There's just too much humidity and it's going to stay with us 'till next week. This is where patience comes into play. The car doesn't have to go anywhere until the latter part of August anyways  BTW, it now weighs 4.78oz. Creeping up on that big FIVE.OHH Later... Lee |
|
|
|
Post by sappingtonr on Jul 2, 2008 19:45:40 GMT -6
Lee, this one looks scary fast. Does it have a name? I think stock is my favorite- those Warp Speed Derbyworx Stock wheels are absolutely the best ever! You are going to like them.
|
|
|
|
Post by knotthead on Jul 3, 2008 4:50:45 GMT -6
I wouldn't be too concerned about its' speed just yet. I've got some serious alignment concerns. When I mounted the rear wheels for the last pic, I noticed severe positive camber on both sides that wasn't there before. I can only imagine that working on the bare wood body out in the hi noon sun on a very humid day, plus all the heat generated from the plastic filler has caused the thin sides to pull inward,and having the car suspended upside down,so all the weight was on the bottom of the axles excerting pressure on the tops of the axle heads compounded the problem. I'd hate to think that this is just an exercise for body and paint, but when my other three cars come back from Minne- sota with their time slips, I'll have good comparison times to see what I'm working against. So, for now, I'll just keep working on the car, and worry about the alignment later. As for a name, yeah, its' got one, but I'm not gonna give it up just yet. Only Mr.Slick has the inside track on it for now, and it will be worn proudly on the body of the car  Lee |
|
|
|
Post by beakerboysracing on Jul 3, 2008 11:23:48 GMT -6
Lee,
I have to say this has been the most interesting and informative thread on car construction I have seen. ;D I really appreciate you sharing your building techniques. I think Lucky and Proquest and Mr Slick should start a whole new topic where guys can do this for their builds. Maybe it could be called "Watch me build it"
See Ya
Scott
Beakerboys
|
|
|
|
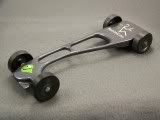
Post by knotthead on Jul 4, 2008 7:12:27 GMT -6
So much for patience... After I posted yesterday morning, I checked the humidity and figured I could get in a couple of coats of color before going to work:  The color is a metallic graphite that in one light looks like a polished Hematite stone, but in another, the metallic really pops and gives a grayer tone. Hard to get a good picture because of the light/dark contrasts. I'll let the paint cure for a day or two, rub it out and shoot a couple more coats. Initially, I thought it would be overweight, but right now, it's only 4.79 oz. I may have to make a small pocket underneath using a 3/8" Forstner bit, so that I can put in some tungsten putty,to bring it to full weight Later... Lee |
|
|
|
Post by Lucky 13 on Jul 4, 2008 20:40:18 GMT -6
Looking good Lee !!!
|
|
|
|
Post by ProQuest on Jul 4, 2008 22:18:29 GMT -6
Really sharp. Keep the pics coming.
Steve
|
|


 I been looking at your work for a while and you are hands down one of the best at woodwork! ;D


 . Wives just don't understand.....